
How to integrate PVS-Studio in Qt Creator without the PVS-Studio plugin
- Viewing Reports
- Analysis of QMake projects
- Analysis of projects based on CMake
- View Report under Windows with MSVC Kit
Viewing Reports
For convenient viewing of analysis results, you can use the PVS‑Studio extension (plugin) for Qt Creator. More details about its installation and use are described in the documentation "How to use the PVS‑Studio extension for Qt Creator".
Analysis of QMake projects
Such projects can be analyzed through the built-in compile_commands.json file generation mechanism.
Analysis of projects based on CMake
You can use the PVS-Studio analyzer to check CMake projects in the Qt Creator environment.
Note. Before using the CMake module, you must enter the PVS-Studio license by running a special command for Windows and for Linux/macOS.
Then add the PVS-Studio CMake module to the project. After that, add the code to the CMakeLists.txt file of the project to create the analysis target:
include(PVS-Studio.cmake)
pvs_studio_add_target(TARGET ${PROJECT_NAME}.analyze ALL
OUTPUT
FORMAT errorfile
ANALYZE ${PROJECT_NAME}
MODE GA:1,2
LOG ${PROJECT_NAME}.log
ARGS -e C:/Qt/
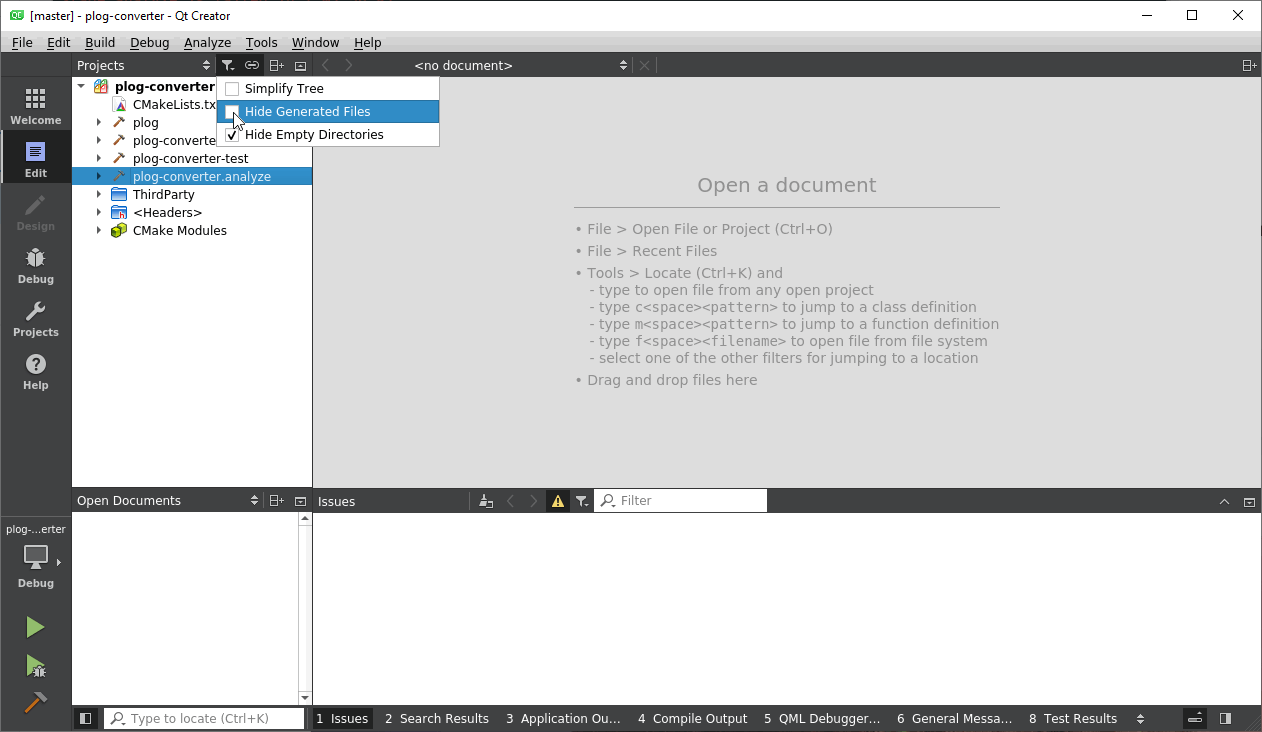
HIDE_HELP)By default, when you open CMakeLists.txt of a project, Qt Creator hides additional build targets. To display them, disable the 'Hide Generated Files' option in project explorer filters:
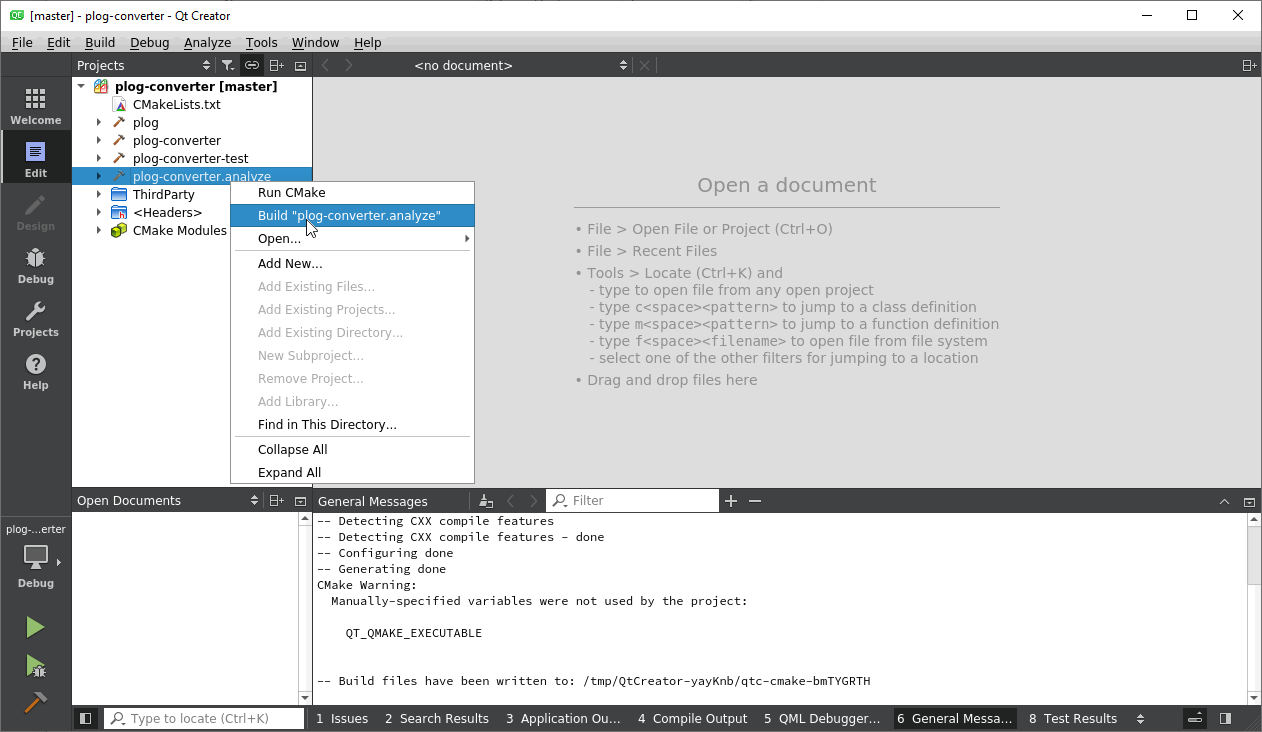
To build and run the analysis, click Build "ProjectName.Analyze" from the analysis target context menu:
After the analysis is complete, errors found by the analyzer will be added to the 'Issues' pane:

View Report under Windows with MSVC Kit
If you are using the MSVC toolkit to build projects on Windows, Qt Creator will change the warning parser to be compatible with the output of Visual Studio compilers. This output format is incompatible with the PVS-Studio output formats. As the result, the analyzer messages will not appear in the 'Issues' pane. To configure support for the errorfile format, follow these steps:
1. Switch to the 'Projects' mode (Ctrl + 5). In the 'Build & Run' section, select the desired Kit. At the bottom of the page, in the 'Custom Output Parsers' section, click on the 'here' link.

2. In the opened window, click the 'Add...' button. In the 'Error message capture pattern' lines, insert the following regular expressions:
For the Error tab
(.*):(\d+): error: (.*)For the Warning tab
(.*):(\d+): warning: (.*)Alternatively, if you want to display low level warnings
(.*):(\d+): (?:warning|note): (.*)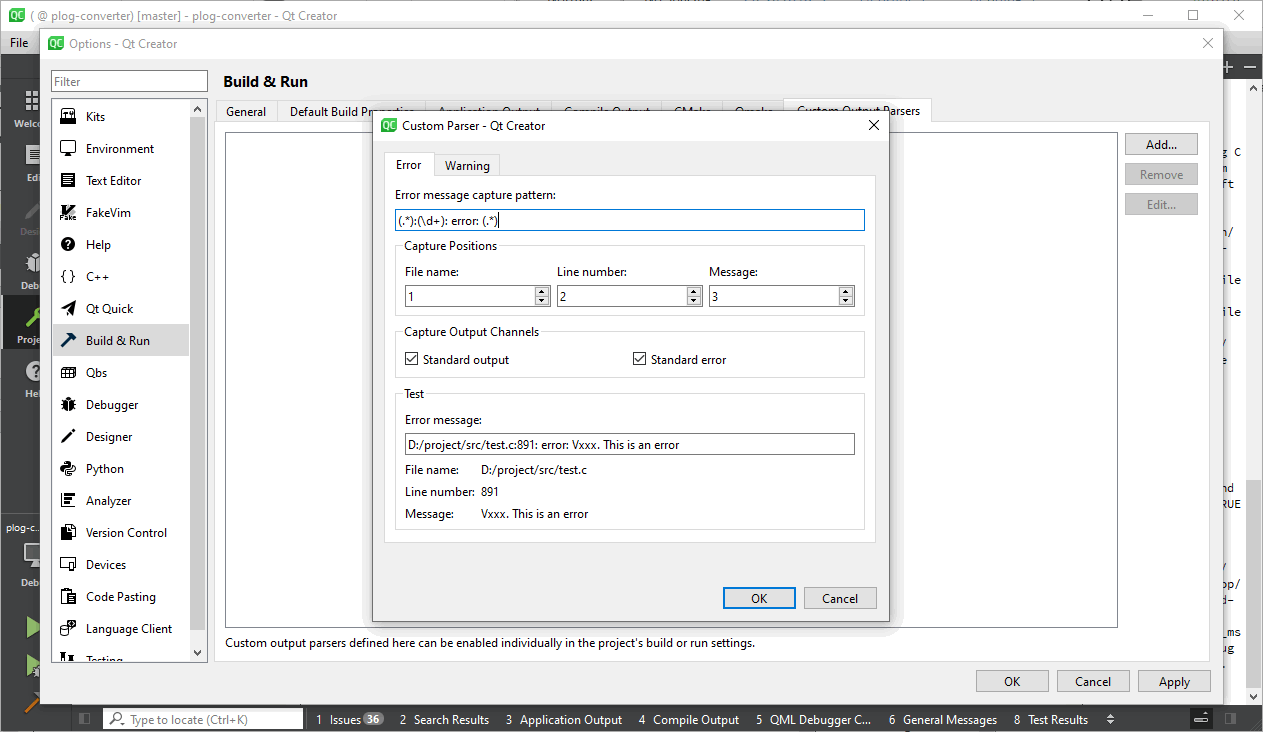
3. After configuring the regular expressions, click 'Ok'. Select a new parser and restart analysis.

As a result, the analyzer warnings will appear in the 'Issues' pane.

Was this page helpful?