
Our website uses cookies to enhance your browsing experience.

The new version of the static code analyzer PVS-Studio 5.10 comes with a small utility PVS-Studio Standalone which you may even miss at first. I'd say that's one small step for mankind but one big leap for PVS-Studio :).
Analysis based on pre-generated preprocessed files is no longer supported. Please consider using the Compiler Monitoring mode instead. This mode allows a generation and analysis of preprocessed files automatically during regular build process.
You can use the current version of this utility in two (for now) ways:
At the same time, the tool supports complete code navigation, all the usual PVS-Studio's settings, and also the table representation of analysis results, which I told you about the other day. This method of analysis result representation allows you to use message filtering and sorting mechanisms to the full extent so that you can comfortably handle large lists of diagnostic messages.
In this article, I'm going to show you two scenarios of using this utility with the highest efficiency.
Suppose that for some reason you don't have Visual Studio installed on your computer. But you've learned from articles that PVS-Studio is a very cool product and want to get analysis results for your project. Since you don't have any of the IDEs supported by PVS-Studio on your computer, you may ask your colleague to check the project on another computer with Visual Studio, save the analysis results into a .plog file and copy it to your computer (better if you also copy the project source codes so that you can navigate through the code and fix bugs). What do you need to do that?
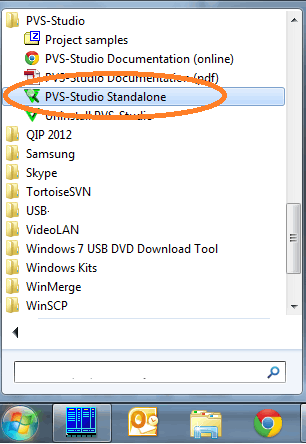
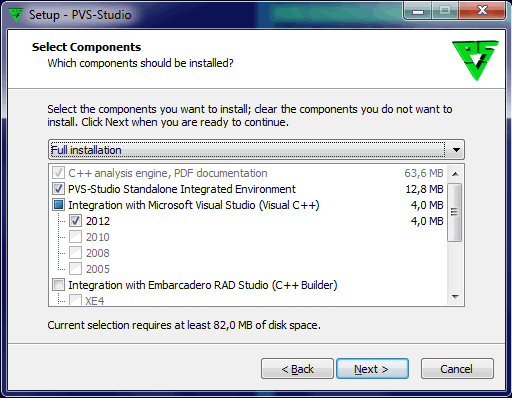
1. Install PVS-Studio Standalone (make sure to select this option in the setup window).
2. Run PVS-Studio Standalone from the Start menu.
3. After the program starts, open the .plog file.
4. You can start examining the log right away, but before that try clicking on any message - you will be asked to specify the folder with the source codes.
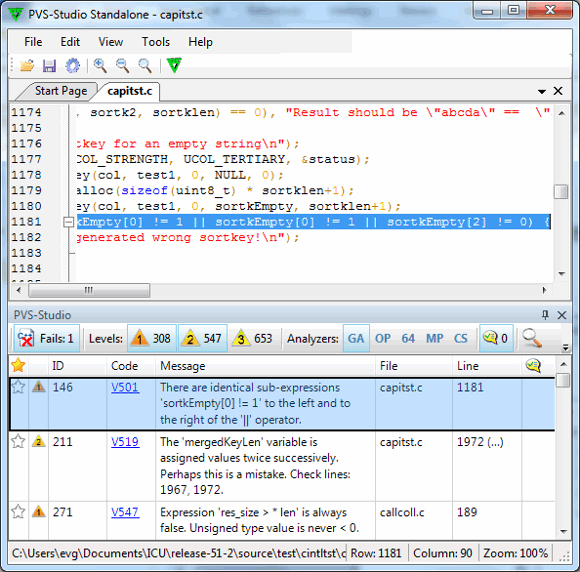
5. Here we go:
6. Now you can view the log, perform message filtering and sorting and even edit and correct the source code!
We hope you won't demand too much from this "environment" of ours: though it is built on Scientilla (like Notepad++), it's incredibly far from a full-blown IDE like Visual Studio. The most serious trouble is the absence of IntelliSence. We try to make up for it by the search dialog. However, you still have the following capabilities:
But I guess many of you will find the second scenario more interesting; so, go on reading.
The coolest thing about PVS-Studio Standalone is not the option that allows you to handle ready logs, but the ability to check preprocessed files. What is the most difficult aspect of PVS-Studio's integration into a customer's project? You see, the analyzer needs to generate preprocessed files to be able to perform analysis. If you have a project file .vcproj/.vcxproj (i.e. you work in the Visual Studio environment) PVS-Studio creates preprocessed files automatically once you click on the "Start" button. But if you happen to work in a different mode (say, you use a makefile), you'll have to integrate a PVS-Studio call into the build system, which may be troublesome for certain reasons.
This mode is reasonable to use because it is easy, above all. Our experience tells us that with most build systems it's easier to add one more flag in the compilation parameters for all files rather than integrate an analyzer call "in parallel" with the compiler. Although direct integration of an analyzer into the build process is certainly a better solution from the "ideological" viewpoint, this practice is sometimes not very suitable when you want just to give the analyzer a quick try on your project.
This is where our new tool PVS-Studio Standalone comes in handy. You can feed it with preprocessed files for it to analyze them and even map them to the source codes. That is, you'll get diagnostic messages on the source codes, not the preprocessed files. Let's see how it is actually done.
I'm going to test PVS-Studio Standalone on... let it be zlib. No, no, it's not another report article about errors found in zlib. There will be very few warnings on it, so don't be surprised. The library is clear. Besides, PVS-Studio checked zlib's code for a number of times when checking other projects, so all the false alarms on zlib were eliminated long ago. This article is meant to demonstrate usage of the new tool, not to tell you about bugs found in some project. That's why I've chosen a relatively simple project, so that everyone understands what we are doing.
1. Open the Makefile.msc to edit it.
2. Add the switch /P to generate the preprocessed files. That is, instead of the command
CFLAGS = -nologo -MD -W3 -O2 -Oy- -Zi -Fd"zlib" $(LOC)
we have
CFLAGS = -nologo -MD -W3 -O2 -Oy- -Zi -Fd"zlib" /P $(LOC)
3. Generate the preprocessed files:
nmake -f Makefile.msc clean
nmake -f Makefile.msc
4. Make sure that our .i files are in the necessary folder.
1. Run PVS-Studio Standalone.
2. Select the Tools menu, then the Verify Preprocessed Files... command.
3. Fill in the fields as shown below:
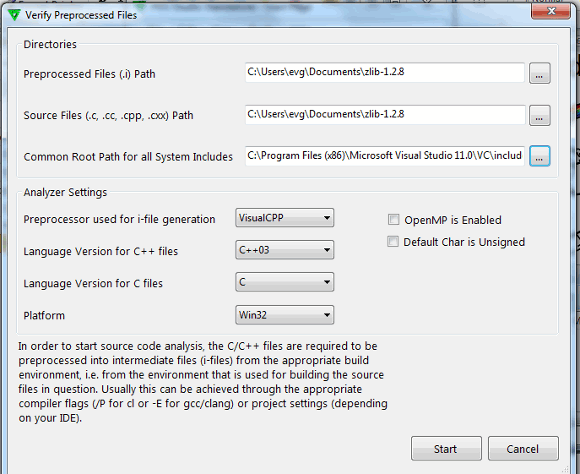
What you should be especially careful about is the paths to your source codes and to the .i files (these paths coincide in our case); the paths to the system include-folders (so that you don't get error messages on them), and some other parameters.
You may want to view the list of supported preprocessors:
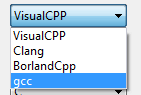
Those readers who have been following our articles for a long time may ask in surprise: "So, you guys support gcc now?!" Yes, we do! We support it in case of MinGW and Cygwin and (God, they've done it at last!) Linux.
So, now you can check even linux-projects, though this is a freshly added functionality and it hasn't been properly tested yet, to be honest. Those who feel like experimenting with it please report any troubles that may occur to us; we'll try to fix them as quickly as possible.
4. Having filled in the dialog window, click on the Start button. A bit later we get a window with the analysis results and navigation options:
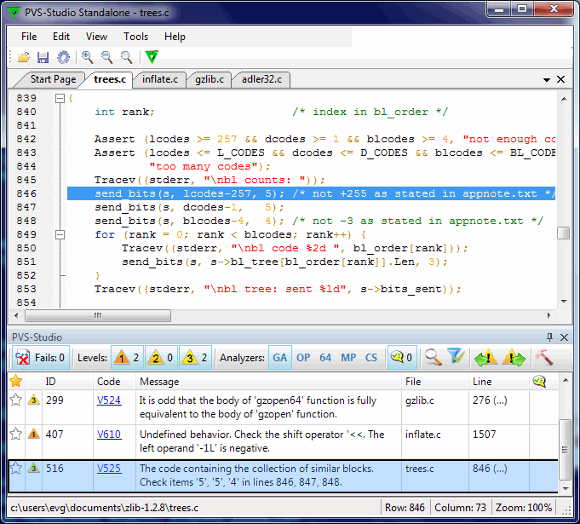
You can check and CORRECT the code right in PVS-Studio Standalone!
We've created a very cool app which extends PVS-Studio's scope of use in a way very convenient to users.
Now everyone who wanted us to support MinGW, Cygwin and gcc or for some reasons faced troubles when trying to check their code with PVS-Studio, go download the new version and experiment with PVS-Studio Standalone.
P.S. By the way, it's the first article about PVS-Studio with so many screenshots :-)
0
0
0
0