Before starting to study the technique of parallelizing programs with the help of OpenMP technology, let us discuss the toolkit we will need. And here is what we will need first of all - Visual Studio 2005/2008 and Intel Parallel Studio.
The advantage of OpenMP technology is that you may take the code of a serial program and parallelize it without significantly modifying it. It is done with the help of special directives arranged throughout the program text. Of course, in practice you will not only have to add directives but also edit the application code but these changes will be much fewer than if using alternative technologies such as MPI.
All said above means that you may take a common C/C++ serial code and start parallelizing it gradually. To do it you just need to enable OpenMP support in the project. Go to the project properties in Visual Studio 2005/2008 environment and choose the tab C/C++ / Language as shown in Figure 1.
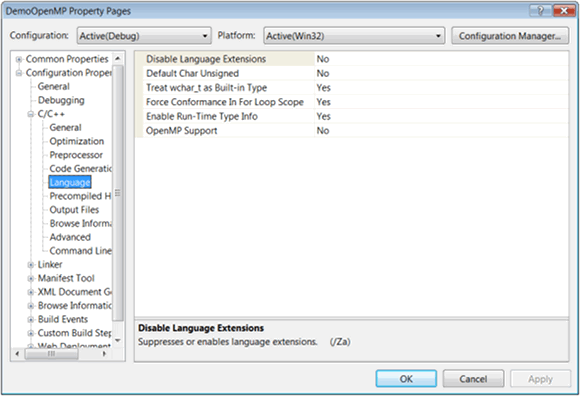
Figure 1 - The tab of project settings in Visual Studio where you may enable OpenMP support
Do not forget also to choose the platforms and configurations you want to employ OpenMP in. As shown in Figure 2, we have chosen all the configurations (debug, release) and all the platforms (Win32, x64).

Figure 2 - Choosing configurations and platforms to set the properties for
OpenMP support is enabled by the option "OpenMP Support" as shown in Figure 3.
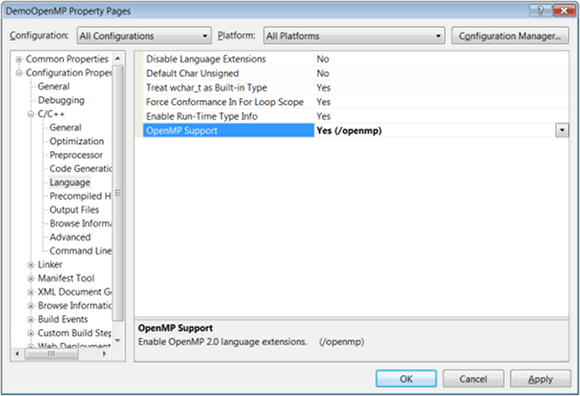
Figure 3 - OpenMP support is enabled
The next step is to enable the header file "omp.h". It is often reasonable to put "#include <omp.h>" into "stdafx.h" to make it visible to the whole project.
These are all the preliminary steps you should make to start mastering OpenMP technology and parallelizing the program code. We will begin to study OpenMP in the next post. But now let us continue discussing the tools. You see, although Visual Studio 2005/2008 provides all the necessary functions to develop parallel OpenMP programs, it is too restricted. It is better to employ Intel® Parallel Studio to conveniently and efficiently work with OpenMP. I am not Intel employee and I am not paid for advertising its tools - I recommend it because it is really a convenient and very useful tool for developing parallel applications. I recommend it relying on my own experience.
Intel Parallel Studio distribution kit is about 460 Mbytes and you may download it from the Intel site. Parallel Studio functions remain unlimited during one trial month - this time is quite enough to understand the working principles and carry out some experiments with parallel code. Parallel Studio integrates into Visual Studio 2005/2008 and adds the corresponding menu and toolbar items (see Figure 4).
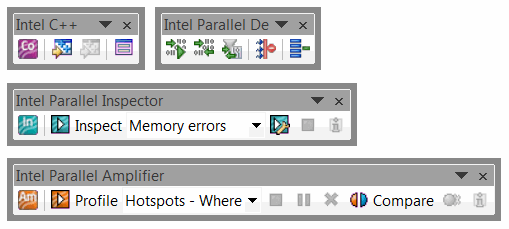
In the next parallel notes we will use the tool Intel Parallel Inspector from the Intel® Parallel Studio package to check the parallel code being created for parallel errors. We will also use Intel® Parallel Amplifier in optimization purposes. We do not necessarily need Intel Parallel Composer compiler but still we will use it to compile OpenMP applications. One of its advantages is that it supports OpenMP 3.0 standard while the Visual Studio 2005/2008 compiler provides support only for OpenMP 2.0. Also, Intel C++ provides some additional functions of static analysis of parallel code - you may read about them in the article.
To compile an application with Parallel Composer you should enable Intel C++. Click the button "Use Intel C++" on the toolbar to do that as shown in Figure 5.
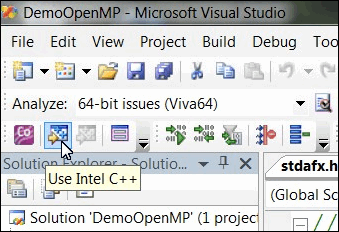
Now Intel C++ will be used to build applications. And one more thing - if you see a message like the one shown in Figure 6 on launching the application, do not get upset.
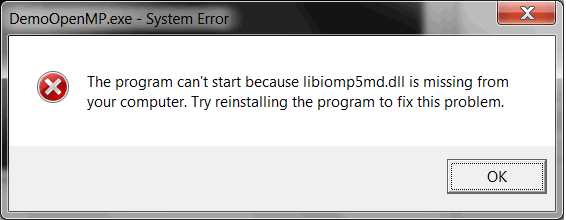
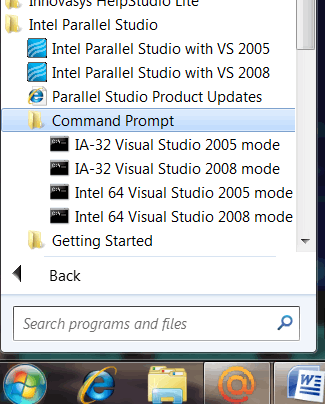
Try just to relaunch Visual Studio to enable the changes introduced by Parallel Studio into the environment. If it does not help, set the environment manually by launching the corresponding command files. You may do this from the Start menu as shown in Figure 7.
Introduction into the tools is over at this point. Download and install Intel Parallel Studio and try to build some simple program of yours with Intel C++.
0