
Our website uses cookies to enhance your browsing experience.

Want to distribute a large project build across multiple computers? Easy! Let's figure out how to use Unreal Horde, a new tool inside Unreal Engine 5.5. Besides, we'll cover how to run PVS-Studio analysis using it.

The Unreal Engine 5.5 game engine has a new tool called Horde—a platform that enables you to use CPU cycles on other machines to distribute the load.
Horde includes the Unreal Build Accelerator—a tool that implements virtualization for third-party programs, for example, C++ compilers or PVS-Studio analyzer. It lets such programs work on a remote machine, communicating with the initiating machine as needed.
In this article, we explain how to use these Unreal Engine features and run the analysis of an Unreal Engine project using PVS-Studio on several machines at once.
This is how you can install a Horde server on your machine.
First, link your Epic Games account to GitHub. You can do it in the Apps and Accounts section in your Epic Games account settings. After linking your account to GitHub, you'll receive an invitation to the Epic Games organization. Accept it to perform the actions below.
To install the Horde server on Windows, just run the right installer. You can download it by the link.
In addition, you can deploy the Horde server using Docker. To do this, generate a Personal Access Token on GitHub and use it to authorize to the GitHub Container Registry. Use the following command for this:
docker login ghcr.ioIf the authentication is successful, the following command will execute and the Horde image will be downloaded:
docker pull ghcr.io/epicgames/horde-server:latestThe Horde server will also require external instances of Redis and MongoDB to run, which must be configured via a configuration file or environment variables.
However, you can deploy the Horde server with all the necessary components at once using Docker Compose. To do this, take the docker-compose.yaml file from the Unreal Engine source code and execute the command in the directory with this file:
docker-compose upAlso, in this file, you can pre-configure the ports on which the Horde server will be deployed. The first port is the interface for server management, and the second port is the API for connecting agents:
....
horde-server:
    image: ghcr.io/epicgames/horde-server:latest
    restart: always
    environment:
      Horde__HttpPort: 13340
      Horde__Http2Port: 13342
      Horde__RedisConnectionConfig: redis:30002
      Horde__DatabaseConnectionString:
 mongodb://horde:dbPass123@mongodb:27017/Horde?authSource=admin
    ports:
      - 13340:13340 # Agent connection port
      - 13342:13342 # Agent connection port
    volumes:
      - ./data:/app/Data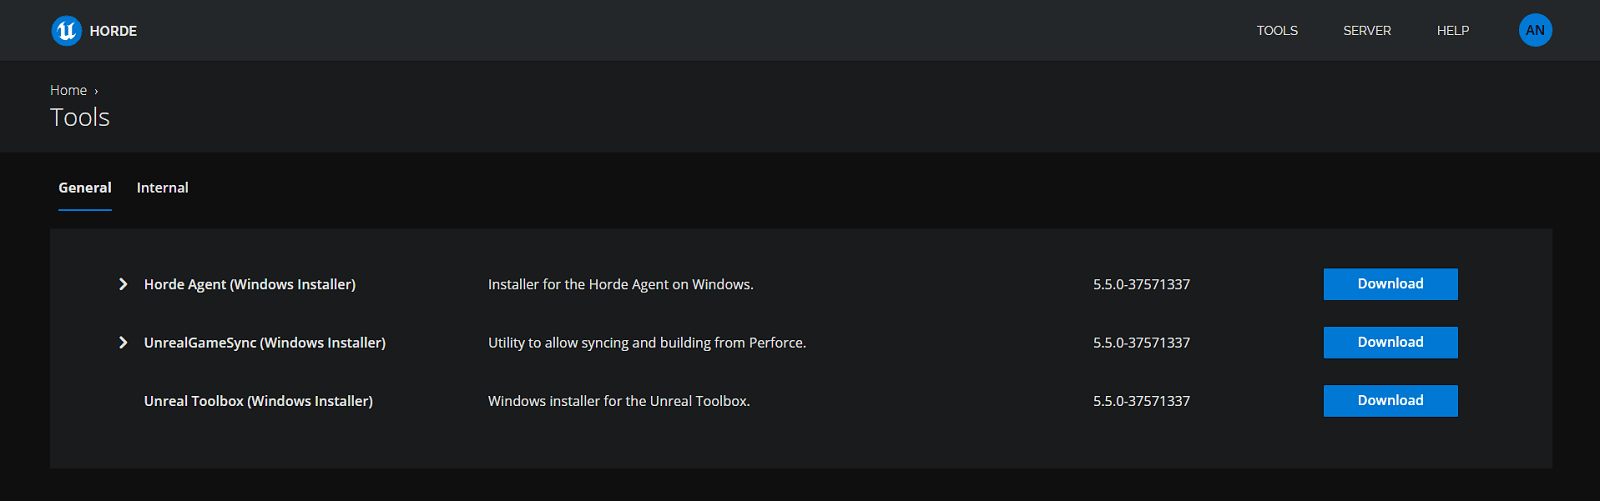
....In order to add agents to the Horde server, you must have a Horde Agent installed on the computers that will act as agents. The link to install it is available on the Horde server via the URL { HordeHost }/tools:
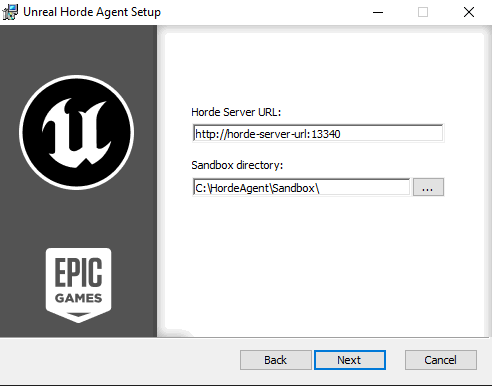
When installing the Horde Agent using .msi, specify the server URL to which it will connect:
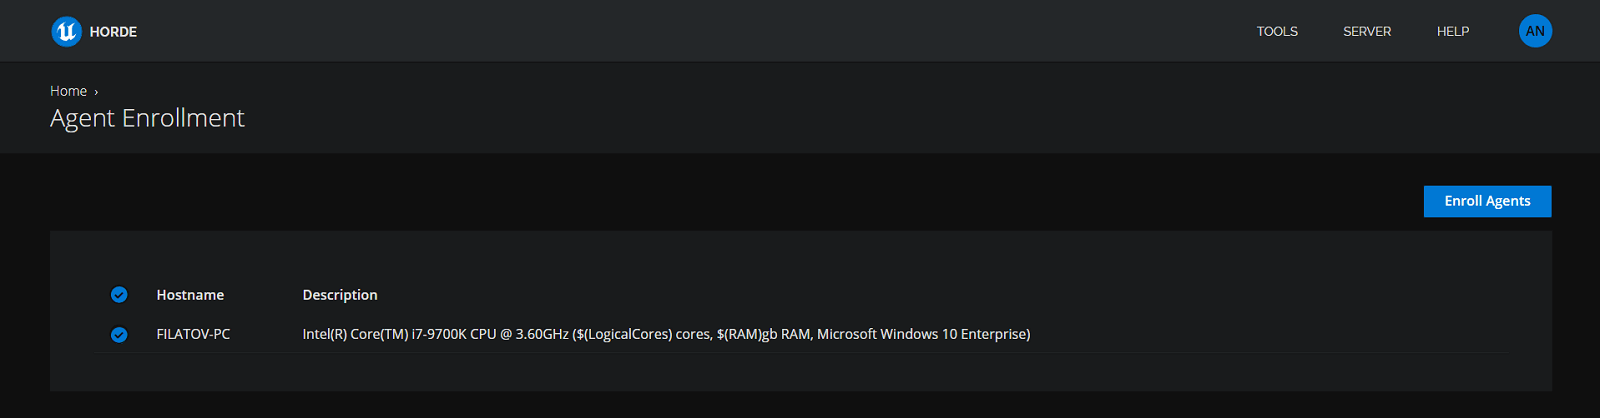
After the installation is complete, leave the Enroll agent with the Horde Server option enabled so that the agent will appear in the list of available agents on the Horde Server. This list is located via the URL /agents/registration. Once the Horde Agent is installed on the remote machine, this page will display information about the agent:
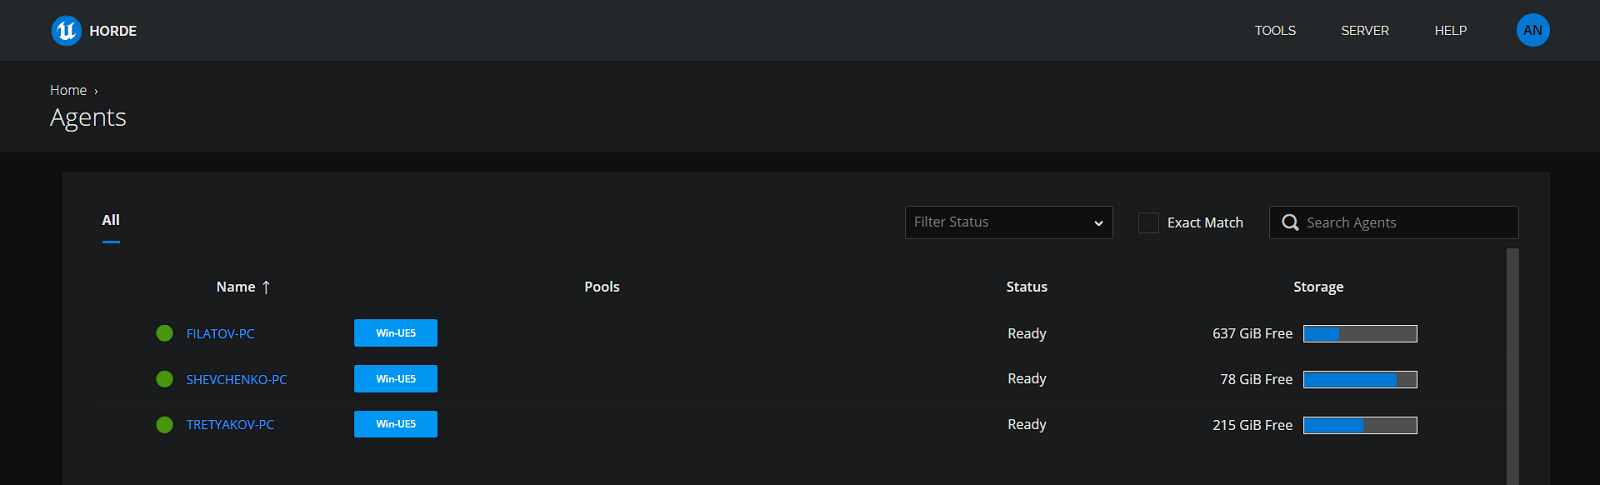
To connect it, select it from the list and click the Enroll Agents button. After that, an available agent will appear in the list of agents on the server (at the URL /agents):
Now let's see how to use remote computers to balance the load in Unreal Engine-related tasks.
In order for the project build to run on multiple computers, edit the BuildConfiguration.xml file (see the Unreal Engine documentation to see the location). In this file, add a few properties responsible for the use of Horde and UBA:
<?xml version="1.0" encoding="utf-8" ?>
<Configuration xmlns="https://www.unrealengine.com/BuildConfiguration">
  <BuildConfiguration>
         <bAllowUBAExecutor>true</bAllowUBAExecutor>
     </BuildConfiguration>

     <Horde>
         <Server>http://horde-server-url:13340</Server>
         <WindowsPool>Win-UE5</WindowsPool>
     </Horde>

     <UnrealBuildAccelerator>
         <bForceBuildAllRemote>false</bForceBuildAllRemote>
         <bLaunchVisualizer>true</bLaunchVisualizer>
     </UnrealBuildAccelerator>
</Configuration>
Here, bAllowUBAExecutor with the value true indicates that UBA will be used in the build process. The Horde group contains settings of the utilized Horde server. The UnrealBuildAccelerator group contains the UBA settings:
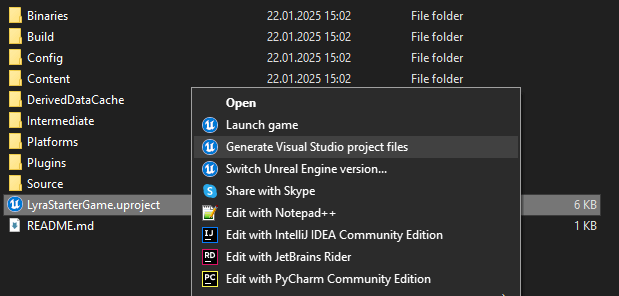
bForceBuildAllRemote with the value false indicates that the build must run not only on remote computers, but also on the server;bLaunchVisualizer with the value true requires the visualizer to be displayed at build time.Let's move on to the project and generate project files for Visual Studio from .uproject to open the project in this IDE.
Now we make some changes. In the class constructor in the target file, add the following field:
StaticAnalyzer = StaticAnalyzer.PVSStudio;What for? We do it to analyze our project using PVS-Studio—the analyzer that can be integrated into the Unreal Build Tool to check Unreal Engine projects. In doing so, we'll run analysis on several computers at the same time!
Note. The full documentation on checking Unreal Engine projects with PVS-Studio is available via the link.
Now everything is ready and you can start the build. I'd like warn you about an issue that my colleagues and I have encountered when building a project with Horde and UBA. Unreal Engine files were unavailable for use by the build system via the installation path. If you also encounter this problem, make sure the file mentioned in the error message doesn't have the Readonly attribute and that all users have full access to it.
The "GenerateMSBuildEditorConfig" task failed unexpectedly.
System.UnauthorizedAccessException: Access to the path 'D:\Epic Games\UE_5.5\Engine\Source\Programs\AutomationTool\Mutable\RunMutableCommandlet\obj\Development\RunMutableCommandlet.Automation.GeneratedMSBuildEditorConfig.editorconfig' is denied.
at System.IO.__Error.WinIOError(Int32 errorCode, String maybeFullPath)
at System.IO.FileStream.Init(String path, FileMode mode, FileAccess access, Int32 rights, Boolean useRights, FileShare share, Int32 bufferSize, FileOptions options, SECURITY_ATTRIBUTES secAttrs, String msgPath, Boolean bFromProxy, Boolean useLongPath, Boolean checkHost)
at System.IO.FileStream..ctor(String path, FileMode mode, FileAccess access, FileShare share, Int32 bufferSize, FileOptions options, String msgPath, Boolean bFromProxy, Boolean useLongPath, Boolean checkHost)
at System.IO.StreamWriter.CreateFile(String path, Boolean append, Boolean checkHost)
at System.IO.StreamWriter..ctor(String path, Boolean append, Encoding encoding, Int32 bufferSize, Boolean checkHost)
at System.IO.File.InternalWriteAllText(String path, String contents, Encoding encoding, Boolean checkHost)
at Microsoft.CodeAnalysis.BuildTasks.GenerateMSBuildEditorConfig.WriteMSBuildEditorConfig()
at Microsoft.Build.BackEnd.TaskExecutionHost.Execute()
at Microsoft.Build.BackEnd.TaskBuilder.<ExecuteInstantiatedTask>d__26.MoveNext()
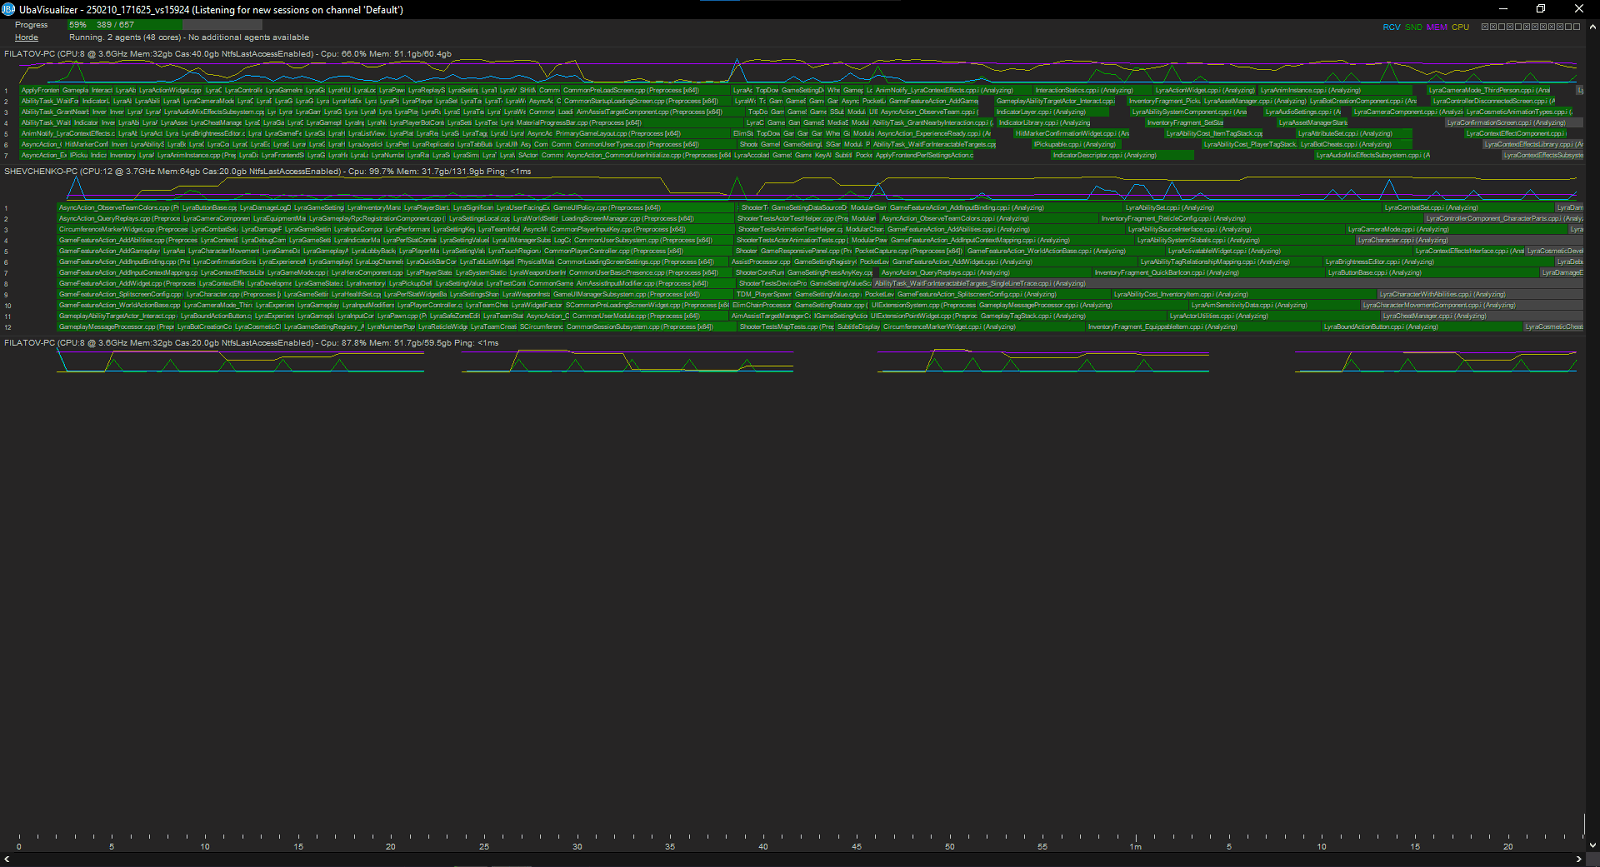
During the build, a visualizer appears on the screen, displaying the processes running on each of the Horde agents:
As a result, we get a project checked by PVS-Studio.
In this article, we've covered how to use Unreal Horde and Unreal Build Accelerator to distribute an Unreal Engine project build and analyze it using PVS-Studio analyzer.
The Unreal Engine documentation section on using Horde is available at the link. Feel free to check your Unreal Engine project with PVS-Studio for free using this link.
0
0
0

0