
Our website uses cookies to enhance your browsing experience.

The PVS-Studio analyzer's been supporting the analysis of the Unreal Engine projects for a long time. Since the last post on the topic, we've hammered away at this mode. That's why we'd like to explain how you can quickly set up the analyzer to check your Unreal Engine project.

Let's look into a real example of a UE project check to demonstrate how static analysis works. As the test project, we'll take Lyra, a sample game project that Epic Games has released with Unreal Engine 5.0. Lyra is a multi-module project that is used to demonstrate the UE5 features.
We work with the project on Windows and build it using Unreal Engine 5.3.2. Let's analyze Lyra using PVS-Studio 7.29.
The PVS-Studio installer is on this page. To analyze Unreal Engine projects in the way described in this article, you need an Enterprise license. You can get a trial Enterprise license at this link. The installation process is quite simple: run the installer and follow its instructions. You only need the Visual Studio 2022 plugin as an additional component. The installation process is described in the documentation. You can request and enter a license directly in the installer.
The analysis of UE projects differs from the analysis of other projects. If you try to run the analysis using standard methods, for example, via the Visual Studio plugin, you'll see a warning that the analyzer can't run it.
This is because the analysis of UE projects is arranged differently. UnrealBuildTool is used to build the project, and the analysis is run through it. To start a static analysis of the project (rather than to build it), it's necessary to configure the project itself.
There are three options to configure the Unreal Engine project:
Each option has unique features and is suitable for different scenarios.
The first option enables you to set up a specific configuration and command (Build/Rebuild). The second option allows you to configure a certain target type. You can learn more about targets here. The third option makes it possible to set global settings for UE projects.
Let's start with the first option, and then I'll tell you how to use the second one.
To run the analysis, pass a special flag to UnrealBuildTool:
-StaticAnalyzer=PVSStudioIn Visual Studio, add this flag to the NMake command of the project and run the build. To add the flag, open the project properties, select NMake and type the flag in the Build Command Line field.
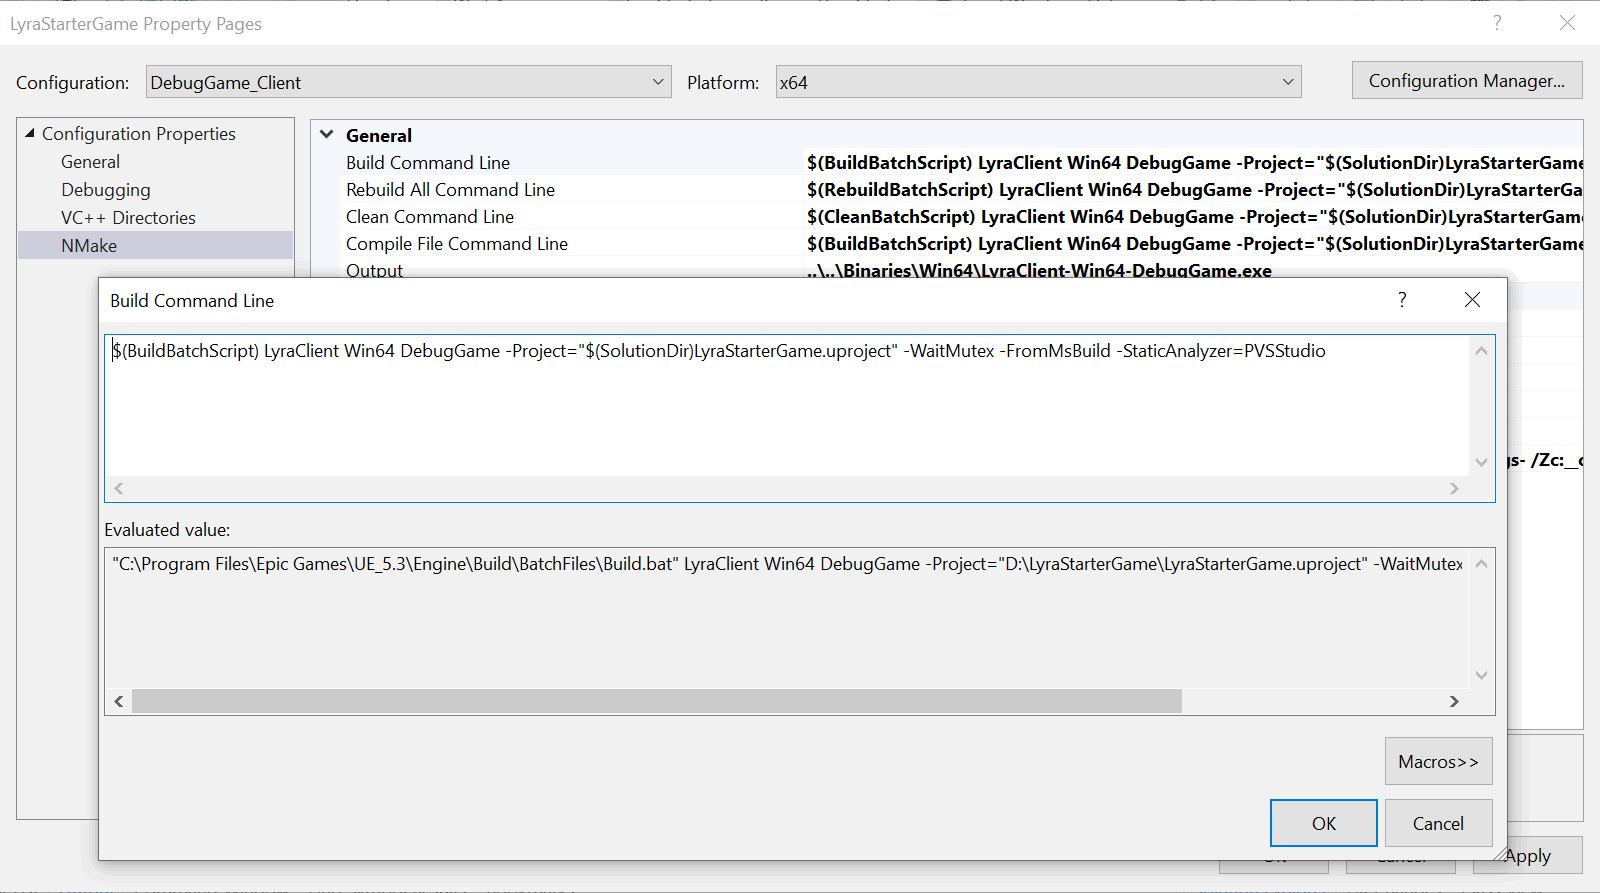
The analysis replaces the project build. If you add the analyzer flag to the Rebuild command, the entire project will be analyzed each time the command is called. If you modify the Build command, only modified files will be checked when you run the command.
For more information on how to run the build and analysis for the project, see the documentation.
You can run the analysis using NMake if you open the Unreal Engine project through the .sln file.
JetBrains Rider has an option to open the UE projects directly via the .uproject. In this case, the NMake command modification isn't available, so we need to default to setting the StaticAnalyzer parameter in the .target.cs file.
By default, the report isn't opened in the PVS-Studio plugin window when analyzing the UE project. To load the analysis report into the plugin table, enable the AutoloadUnrealEngineLog setting before running the analysis. The report is saved in the project subfolder: Saved/PVS-Studio (in Lyra, it'll be "\LyraStarterGame\Saved\PVS-Studio\LyraGame.pvslog")
So, you run the analysis and you see the following:
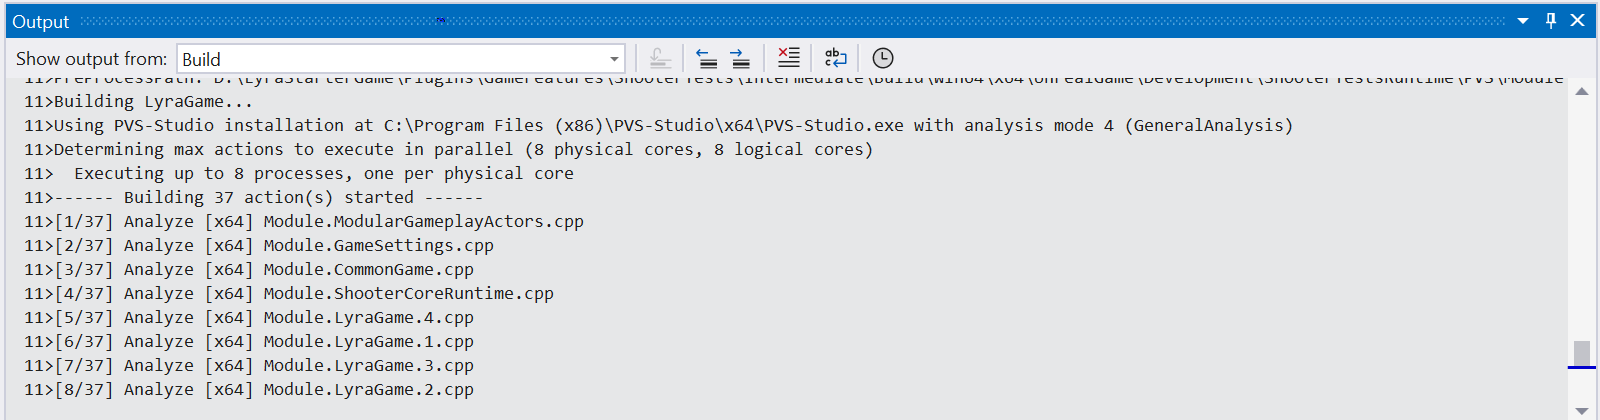
The modules are analyzed, not the project source files.
Additionally, the table contains warnings related to the Unreal Engine core, not the project.

Let's see how to get a more relevant report for the project.
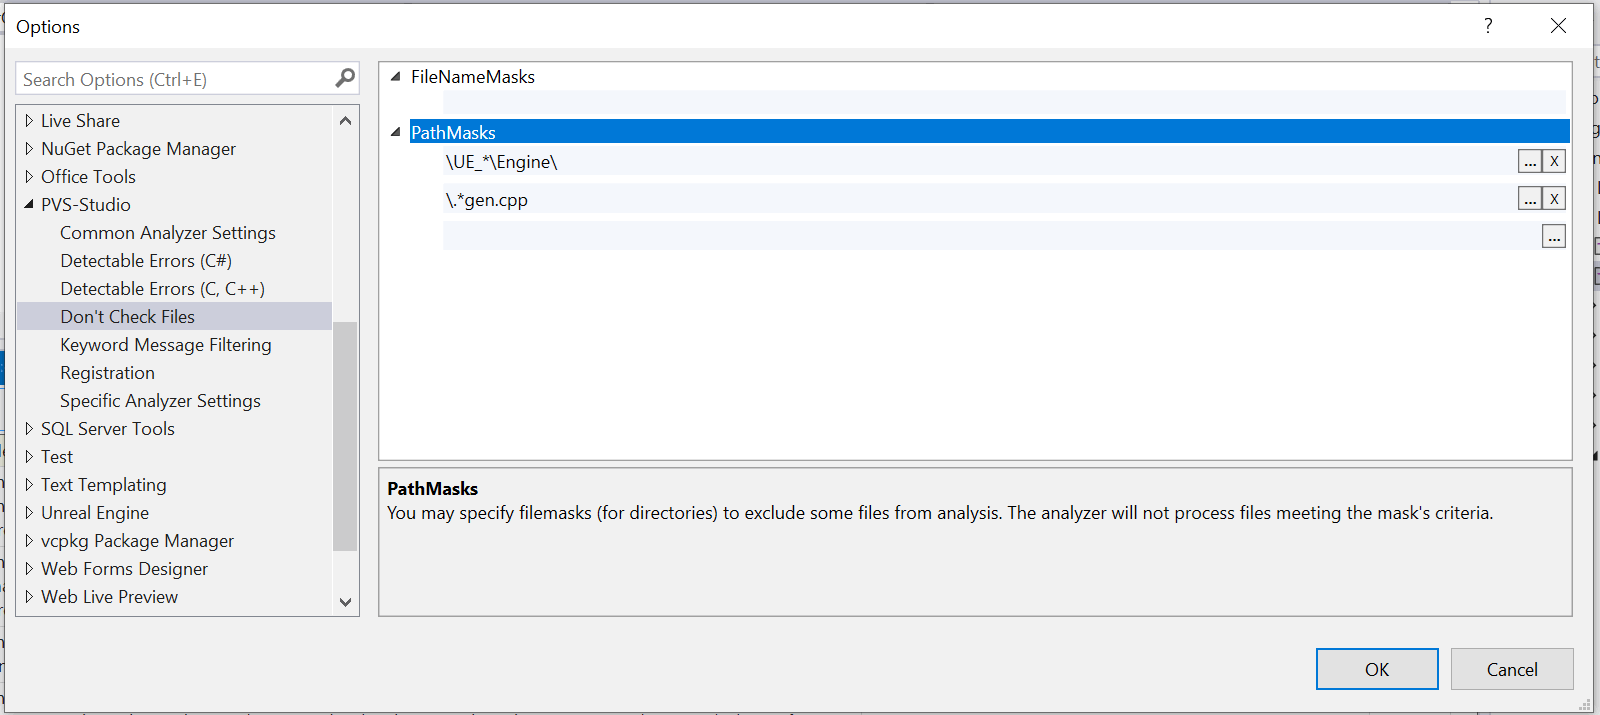
If you don't configure the analysis in advance, the analyzer will check the auto-generated files. It's pointless to work with warnings in such files, and when you analyze them, you need extra time. Therefore, you can safely disable their check: use the Don't Check Files > PathMasks item in the PVS-Studio plugin. Let's add a mask to it:
*.gen.cppAnother issue with the analysis not being configured is the analysis of the Unreal Engine core source files. If we developed a plugin for UE or modify the core itself, such a check would be necessary. But right now, we're only interested in checking the project. So, add the path to the Unreal Engine core to the PathMasks setting. By default, the path masks corresponding to the standard Unreal Engine path are disabled in the settings. If you use Unreal Engine from GitHub, add the correct mask.
After restarting the analysis, we get this report:
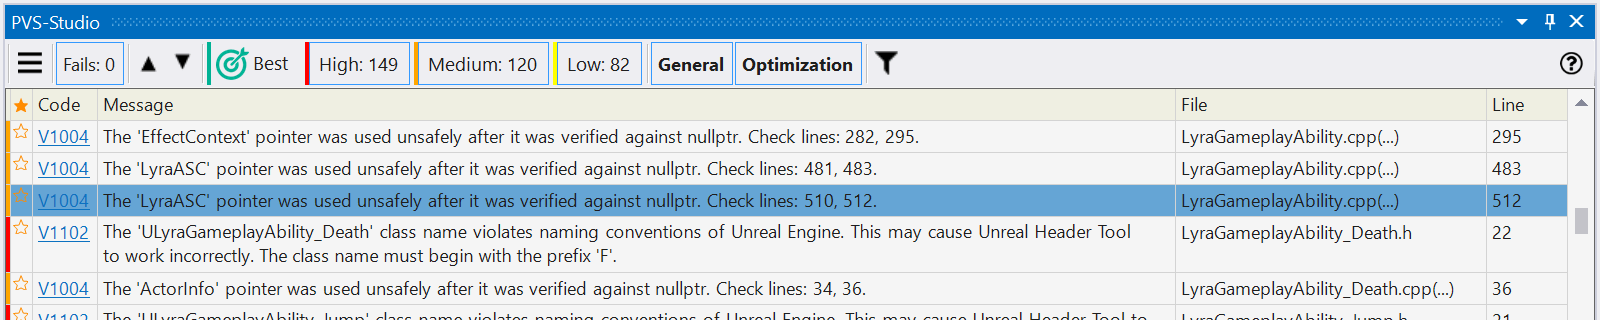
There are fewer warnings and now you can easily handle them.
Let's explore the second way of running PVS-Studio.
Like other settings, you can set up the analysis run in the .target.cs files. This option is most handy if you have to frequently regenerate project files. In this scenario, modifying the NMake commands won't work because they won't be saved during the solution regeneration.
To integrate PVS-Studio with UE, add the StaticAnalyzer parameter with the StaticAnalyzer.PVSStudio value to the .target.cs file.
In the LyraGame.Target.cs, it'll look like this:
public class LyraGameTarget : TargetRules
{
public LyraGameTarget(TargetInfo Target) : base(Target)
{
Type = TargetType.Game;
ExtraModuleNames.AddRange(new string[] { "LyraGame" });
StaticAnalyzer = StaticAnalyzer.PVSStudio;
LyraGameTarget.ApplySharedLyraTargetSettings(this);
}
....
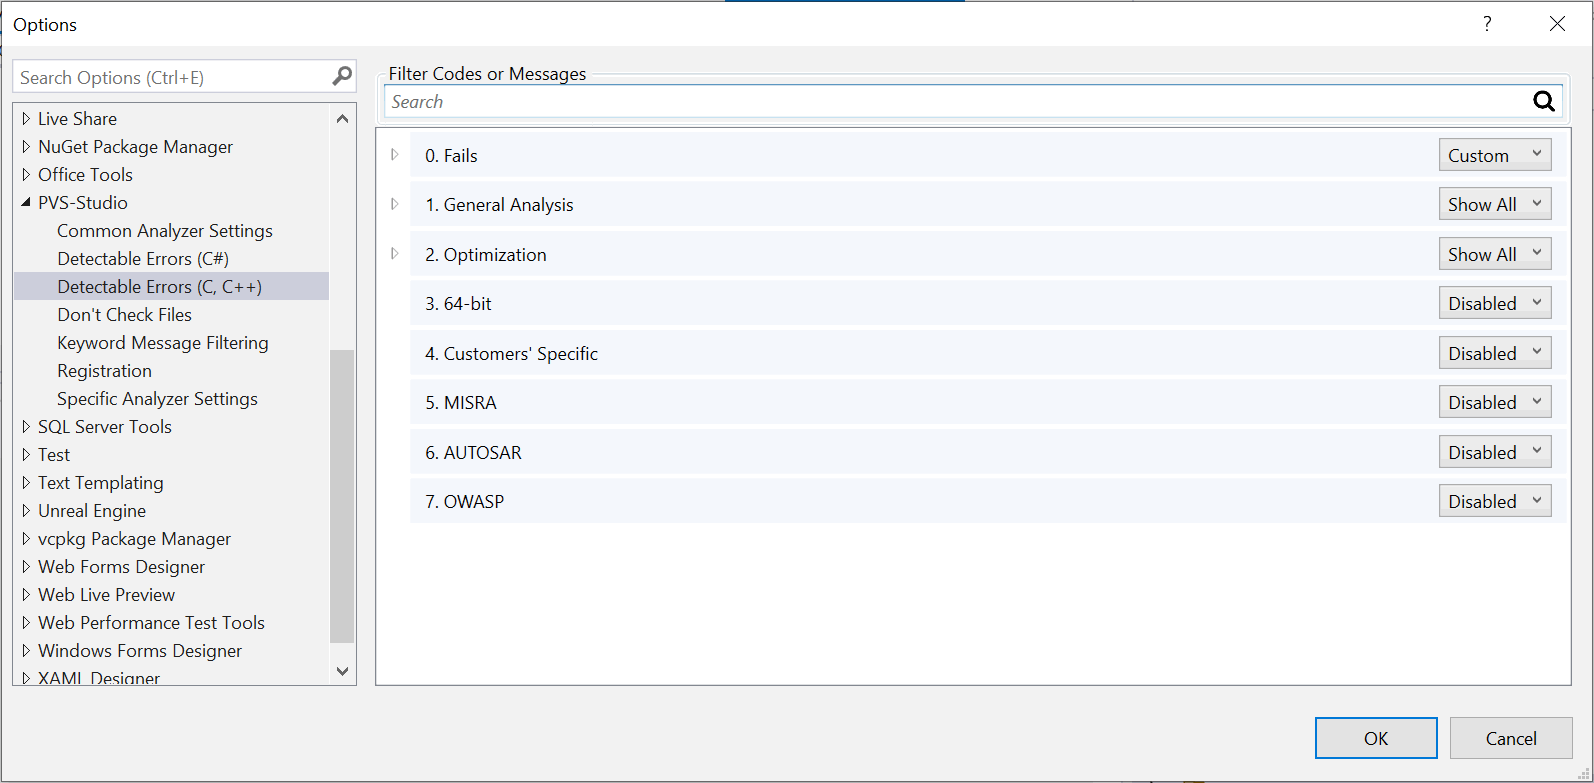
}In the .target.cs file, you can set several more PVS-Studio-specific settings, for example, enabling diagnostic groups or the analysis timeout. You can learn more about the settings in the documentation. The same settings can be set in the PVS-Studio plugin interface.
In the .target.cs file, you can set up general settings of UnrealBuildTool which will be executed only during analysis. To do this, add the following statement:
if (StaticAnalyzer == StaticAnalyzer.PVSStudio)
{
  // Settings
}
This scenario can be used, for example, to disable the unity build functionality.
Unity build is a method used in C and C++ software development to speed up the compilation of projects by combining multiple translation units into a single one. The feature is enabled by default in UnrealBuildTool.
Since the PVS-Studio C++ analyzer checks the translation units, you can see in the analysis log that not the source files but merged files with the Module prefix are analyzed.
This setting allows you to optimize build time. However, it may have an impact on the analysis. Large files may cause memory shortages during the analysis.
To disable the feature, use the following code:
if (StaticAnalyzer == StaticAnalyzer.PVSStudio)
{
  bUseUnityBuild = false;
}
Voila! We've finally set up the analysis.
The PVS-Studio team works on more diagnostic rules specific to Unreal Engine.
For example, the V1100 diagnostic rule. This warning is issued when the analyzer detects a non-static class data member that has been declared as a pointer to a type derived from UObject inside a class/structure that is not derived from the UObject type. The Unreal Engine garbage collector may destroy an object addressed by this pointer.
Another example is the V1102 diagnostic rule. The analyzer issues this warning when it detects a declaration that does not comply with Naming Conventions for Unreal Engine projects. For example, names of classes inherited from UObject are prefixed by U, and enumerations are prefixed by E. Compliance with these conventions is required for the correct operation of the Unreal Header Tool.
As you can see, setting up the PVS-Studio integration with Unreal Engine is quite straightforward. Future releases of Unreal Engine and PVS-Studio will offer new ways for configuring the analysis. You're welcome to follow our updates.
If you want to work both with PVS-Studio and Unreal Engine, you can download the analyzer and learn more about the analysis of the Unreal Engine projects.
0
0
0

0