
How to use PVS-Studio in GitHub Actions
GitHub Actions is a platform that allows you to solve CI/CD tasks related to code in GitHub repositories. It automates reactions to events in the repository via scripted Workflows. This allows you to automatically check the project's buildability and start testing as soon as new code is added to repository. Workloads can use the environments of cloud virtual machines or self-hosted agents with the provided configuration.
This documentation describes an example of the PVS-Studio integration for analyzing C and C++ code. The commands to run PVS-Studio for analyzing C# or Java code will be different. Please consult the following documentation sections: "Analyzing Visual Studio / MSBuild / .NET projects from the command line using PVS-Studio" and "Direct use of Java analyzer from command line".
Running full analysis manually
To create a new Workflow, create a YAML script in the directory of the '.github/workflows' repository.
Let's look at the following example of the 'build-analyze.yml' script which allows to fully test the project in PVS-Studio:
name: PVS-Studio build analysis
on: workflow_dispatch
jobs:
  build-analyze:
    runs-on: ubuntu-latest
    steps:
      - name: Check out repository code
        uses: actions/checkout@v2
      - name: Install tools
        run: |
          wget -q -O - https://files.pvs-studio.com/etc/pubkey.txt \
            | sudo apt-key add -
          sudo wget -O /etc/apt/sources.list.d/viva64.list \
            https://files.pvs-studio.com/etc/viva64.list
          sudo apt update
          sudo apt install pvs-studio
          pvs-studio-analyzer credentials ${{ secrets.PVS_STUDIO_CREDENTIALS }}
      - name: Build
        run: |
          cmake -DCMAKE_EXPORT_COMPILE_COMMANDS=On -B build .
          cmake --build build -j
      - name: Analyze
        run: |
          pvs-studio-analyzer analyze -f build/compile_commands.json -j
      - name: Convert report
        run: |
          plog-converter -t sarif -o pvs-report.sarif PVS-Studio.log
      - name: Publish report
        uses: github/codeql-action/upload-sarif@v1
        with:
          sarif_file: pvs-report.sarif
          category: PVS-Studio
The 'name' field at the script's beginning specifies the name of the current Workflow, which will be displayed in the GitHub interface.
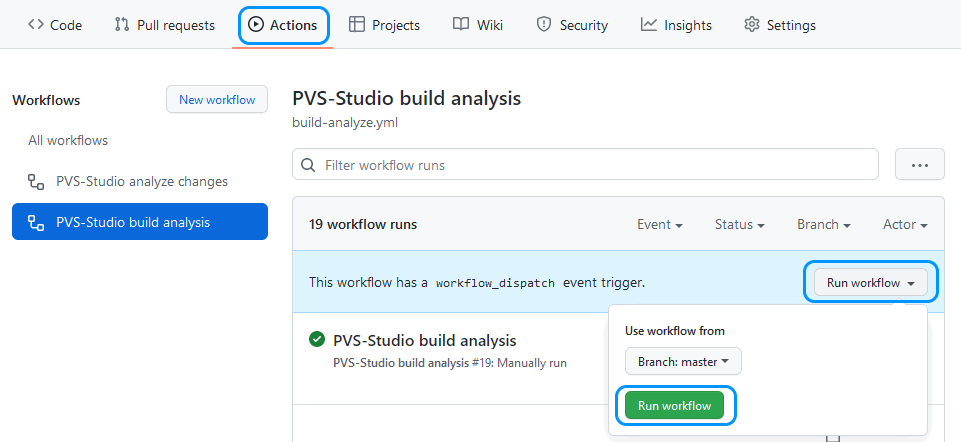
The 'on' field determines the event that would trigger the Workflow. The 'workflow_dispatch' value indicates that the task is started manually. To run it, click on the 'Run workflow' button on the corresponding Workflow.
The 'runs-on' field indicates on which system the task should be executed. GitHub Actions provides cloud servers on Windows, Linux, and macOS systems. In this case we use Ubuntu.
Next comes the 'steps' sequence that performs some actions or a sequence of shell commands.
The 'Check out repository code' step downloads the current version of the repository code.
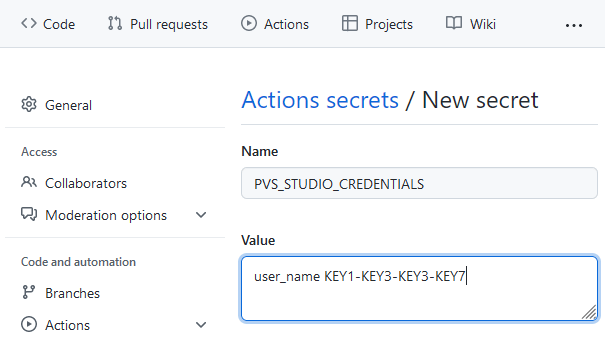
The 'Install tools' step installs and activates PVS-Studio with the registration data. PVS-Studio is activated via an encrypted variable 'secrets.PVS_STUDIO_CREDENTIALS'. It contains user ID and a key.
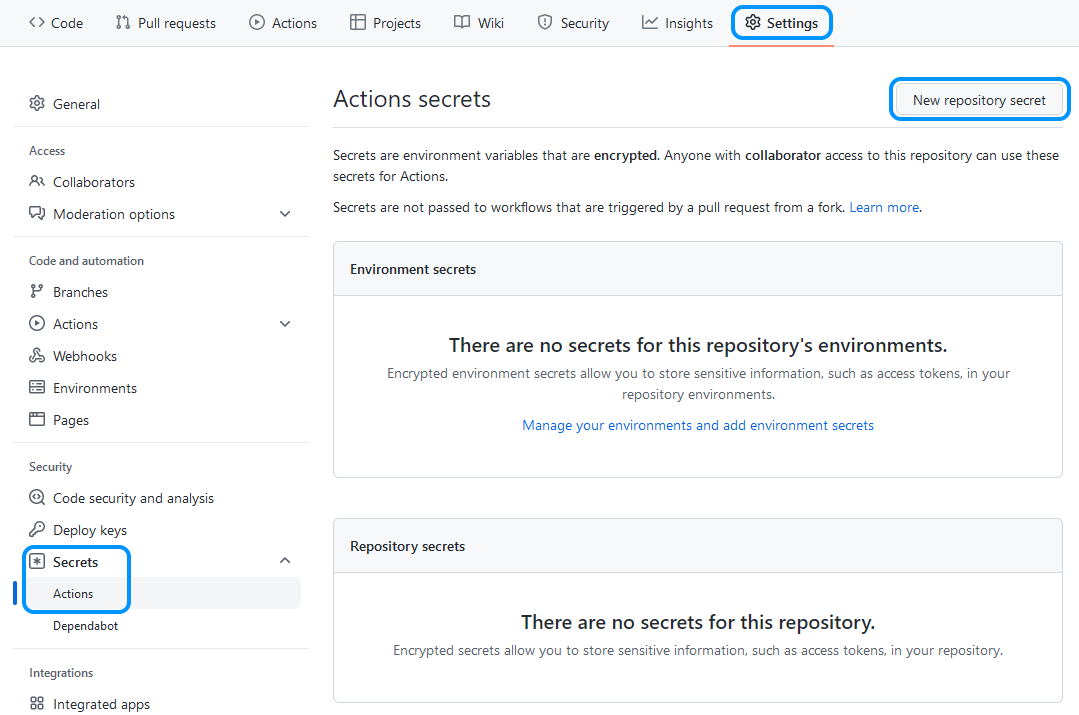
To create a secret, go to 'Settings > Secrets > Actions' and click the 'New repository secret' button.
Create a new variable with a username and a key. GitHub saves it in encrypted form and after that it cannot be viewed. The variable text is modified even in the console output.
The 'Build' step builds the project. In this case — via CMake. It also generates the 'compile_commands.json' file that's used by the analyzer to determine the analysis targets.
The 'Analyze' step starts the project analysis and saves the result as an internal representation in the 'PVS-Studio.log' default file.
For more information about the pvs-studio-analyzer run parameters, see the documentation.
The 'Convert report' step coverts the analyzer report into the required format, in this case — SARIF. The plog-converter utility converts and combines reports from different analysis runs and filters messages in them.
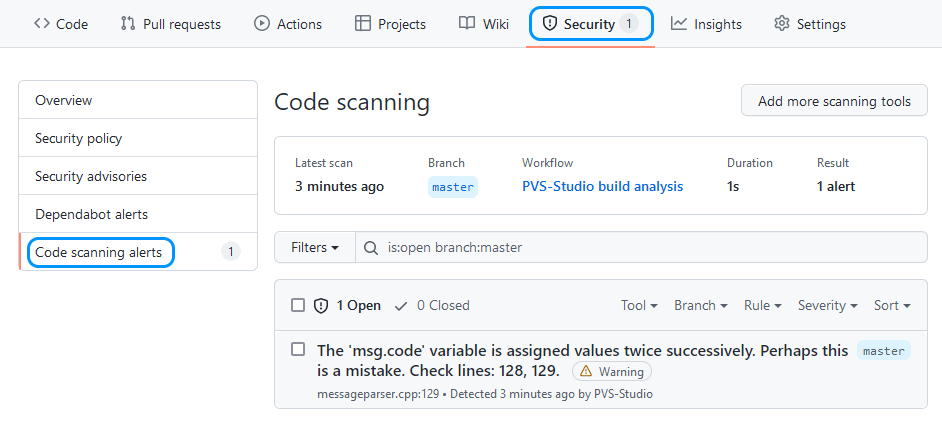
Finally, the 'Publish report' step publishes the final report, and after that you can view it in the 'Security' tab.
Analysis of changes in the repository
To analyze file changes right after they're sent to the repository, create a new script 'analyze-changes.yml'.
name: PVS-Studio analyze changes
on:
  push:
    paths:
      - '**.h'
      - '**.c'
      - '**.cpp'
jobs:
  analyze-changes:
    runs-on: ubuntu-latest
    steps:
      - name: Check out repository code
        ....
      - name: Get list of changed source files
        run: |
          echo "$(git diff --name-only \
            ${{ github.event.before }}..${{ github.event.after }})" \
            > source-files.txt
          cat source-files.txt
      - name: Install tools
        ....
      - name: Build
        run: |
          cmake -DCMAKE_EXPORT_COMPILE_COMMANDS=On -B build .
          cmake --build build -j
      - name: Analyze
        run: |
          pvs-studio-analyzer analyze -f build/compile_commands.json \
                                      -S source-files.txt -j
      - name: Convert report
        ....
      - name: Publish report
        ....
The script has the 'push' event that's triggered by changes in the repository. Besides, this event has the 'paths' path filters. Thus, the analysis starts only when the source code files are changed.
The 'Get list of changed source files' step for the 'Analyze' step receives a list of changed files for the analysis.
The complete build of the project here is required if the project has files whose contents are generated during the build process.
Using the GitHub Actions tools, you can implement a variety of scenarios, including changes not only in the main branch, but also in other branches or pull requests.
Working with SARIF reports
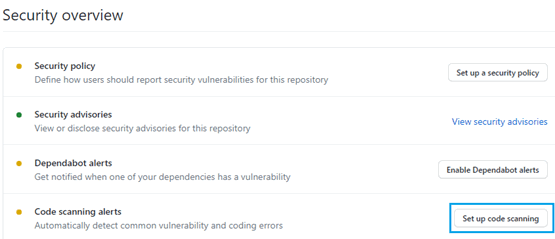
To enable GitHub to parse SARIF files, start by setting up a repository. Open your repository and go to the Security section.
Find the Code scanning alerts item and click Set up code scanning.
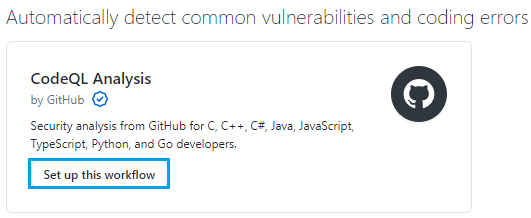
Next, click Set up this workflow.
Now, modify the analysis script. Before publishing the SARIF report, convert the paths to relative ones using the plog-converter utility. As a result, code snippets that triggered analyzer warnings will be correctly displayed in the Security section. For this, use the ‑‑pathTransformationMode (or -R) flag and ‑‑srcRoot (or -r). Read more about parameters of the plog-converter utility here. The example of a report conversion:
- plog-converter report.log -t json -n relative -R toRelative -r $PWD
- plog-converter relative.json -t sarif -n PVSSarif -r file://
Full analysis scripts are as follows:
name: PVS-Studio build analysis
on: workflow_dispatch
jobs:
  build-analyze:
    runs-on: ubuntu-latest
    steps:
      - name: Check out repository code
        uses: actions/checkout@v2
      - name: Install tools
        run: |
          wget -q -O - https://files.pvs-studio.com/etc/pubkey.txt \
            | sudo apt-key add -
          sudo wget -O /etc/apt/sources.list.d/viva64.list \
            https://files.pvs-studio.com/etc/viva64.list
          sudo apt update
          sudo apt install pvs-studio
          pvs-studio-analyzer credentials ${{ secrets.PVS_STUDIO_CREDENTIALS }}
      - name: Build
        run: |
          cmake -DCMAKE_EXPORT_COMPILE_COMMANDS=On -B build .
          cmake --build build -j
      - name: Analyze
        run: |
          pvs-studio-analyzer analyze -f build/compile_commands.json -j
      - name: Convert report
        run: |
          plog-converter PVS-Studio.log -t json -n relative
-R toRelative -r $PWD
          plog-converter relative.json -t sarif -n pvs-report -r file://
      - name: Publish report
        uses: github/codeql-action/upload-sarif@v1
        with:
          sarif_file: pvs-report.sarif
          category: PVS-Studio
After the script execution, you can view static analyzer warnings in the Security section.
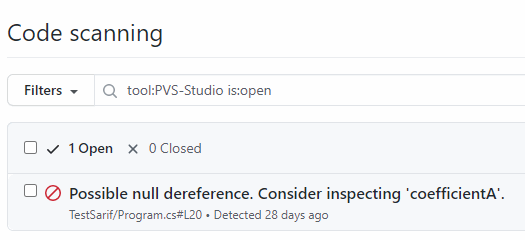
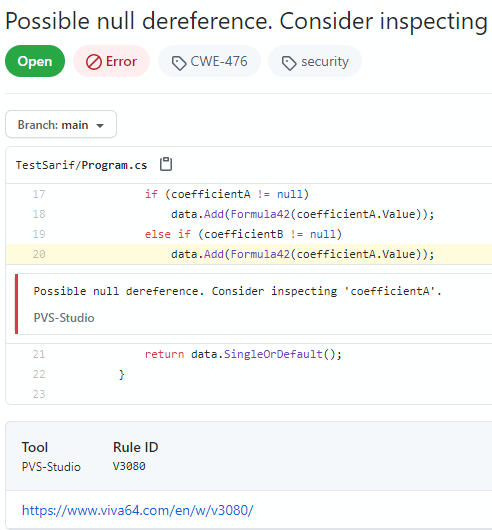
By clicking the analyzer warning, you can see the code snippet with a potential error.
Was this page helpful?